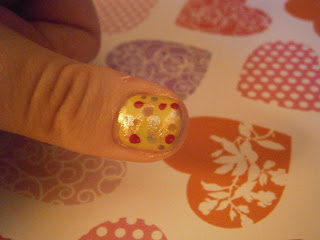
In the end I decided to do the bodies of the characters, a few of the things that Christmas means to be were difficult to do for example family - how would I put my family on a nail?! So I decided to switch that out with Rudolph and I went to do a present on my little finger but it was to small so I decided to change it to a candy cane. I don't eat candy canes - in fact I don't even like them but I have a memory as a child trying a candy cane that was on our Christmas Tree - I had never had one before but I decided to give it a go and it was a very bad decision. After that I can't remember much apart from it tasted horrible and I have never had a candy cane since then!
Base-
To start off I applied a base coat, I like OPI- Natural Nail Strengthener, it smooths out your nails and within minutes your ready to paint your nails without any lumps or bumps.
Christmas Tree-
For the base of the tree you need a green nail polish this is the only one I own but preferably a darker green would work better! I am using OPI - Did it on 'Em. Then using 17 Lasting Fix - Gilt in zig-zag lines to create a tinsel look, using a shimmery nail polish gives a better look. Then using a curby grip open it up and using the end and different coloured nail polish create your baubles that go on your Christmas tree. For this I used China Glaze - Red Satin, Leighton Denny - SuperModel and 17 Lasting Fix - Silva.
Snowman-
Obviously a snowman is white so your going to paint your nail white, I am using 17 Lasting Fix - Mini Skirt. Then to create the scarf I am going to use OPI - Did it on 'Em as a base for the scarf then using China Glaze - Red Satin I am putting strips on the scarf. Then every snowman need his buttons so I am going to use Barry M - Nail Paint in Black to do this, I am again going to use a curby grip to create these dots.
Santa-
For Santa's Coat were going to use China Glaze - Red Satin, I am then going to use 17 Lasting Fix - Mini Skirt to do the white trimming at the bottom of my nail. To do the belt and the buttons I am going to use Barry M - Nail Paint in Black, and a curby grip. Then for the gold accents on his belt I am using 17 Lasting Fix - Gilt.
Rudolph-
To get the perfect reindeer base I used Leighton Denny - SuperModel, I love this colour and think it works perfectly! I then used China Glaze - Red Satin for Rudolph's nose I did this using a curby grip then I used a white nail polish to put a dot on his nose. To create his smile I used Barry M - Nail Paint in Black and again did this using a curby grip.
Candy Cane-
I originally was going to do a present but as my nails are so small I couldn't get it to fit write, so as I said at the beginning I decided to do a candy cane. The Candy cane was the easiest out of them as you only need a red base and a couple white line. I used China Glaze - Red Satin and 17 Lasting Fix - Mini Skirt.


0 comments:
Post a Comment